I hope no one minds me
posting this as I made this bag back in 2012. I wrote a post about it at the
time for a forum I use but part of the reason for starting this blog is that I
wanted somewhere to keep all my musings and learning on sewing processes in one
place. In addition, I found other people's blog posts immensely useful when I
was planning and sewing my weekender bag (I even created a Pinterest board of all the posts I
referred to), and would love to contribute to that pool of knowledge.
Amy Butler's weekender bag is a
pattern with a reputation, a sewing right of passage, and a wonderful
challenge. It was sweeping the internet in 2012, culminating in a blog hop hosted by Heidi and Lori.
I was pregnant with DD2 at the time and just about recovering from that 1st
trimester feeling awful stage where my sewing machine had been untouched for
over 4 months. I couldn't find any quilty inspiration and this grabbed me
instead. I had never made a bag. In fact, I had never even inserted a zipper.
So, what better bag to start with than the most infamous pattern out there?!
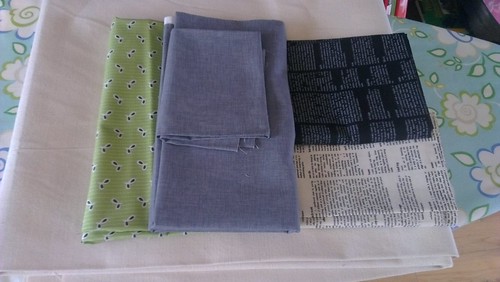
I did so much research, and planning. I knew it had to be a quilt-as-you-go version as it was Elizabeth's awesome example that really grabbed me and made this project irresistible. I found so many tips on adding interior pockets, lengthening and strengthening handles and fathoming out the mysteries of interfacing - all brand new to a newbie quilter! I ordered all the required gubbins from Cotton Patch and set to. There were lots of green and grey pieces in my scrap box, my favourite colour combination, and pulled some lovelies from my stash for lining, handles and piping.
I then started preparing
the panel pieces. I cut my cotton duck as per the pattern instructions for
exterior fabric. Then I unfolded each duck piece and used it as a pattern piece
to cut 2 layers of batting. I wanted to use 2 layers for each piece just to
make sure my bag didn't end up all droopy! I just doubled the batting over,
pinned the duck piece on top and cut round it.
Then I unpinned and added a
tiny bit of spray baste between the 2 batting layers to hold them together.
Marked 1/2" from the edge on the batting and cut that away, making my
batting pieces 1/2" smaller than the cotton duck - this was to take the
batting out of the seam allowances. Then I used a tiny bit more spray baste to
attach the batting to the duck and ended up with this:

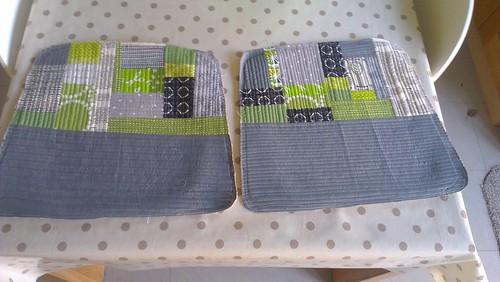
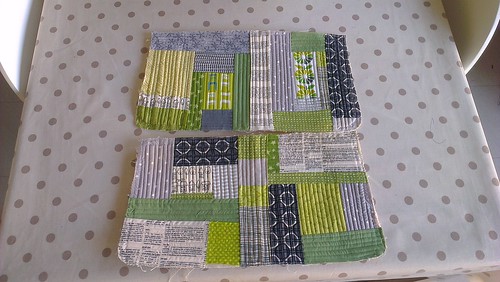
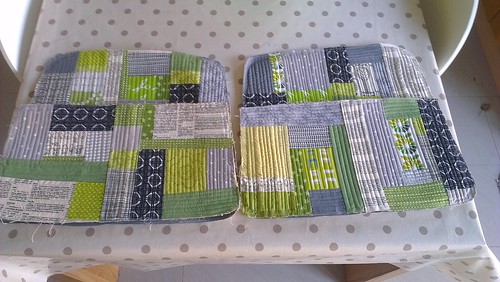
I then just followed Elizabeth Hartman's instructions for
doing the QAYG. That was fine, except I kept forgetting to quilt as I went and
just carried on piecing the next piece, oops!
The panels and pockets came together quickly and were just so much fun.
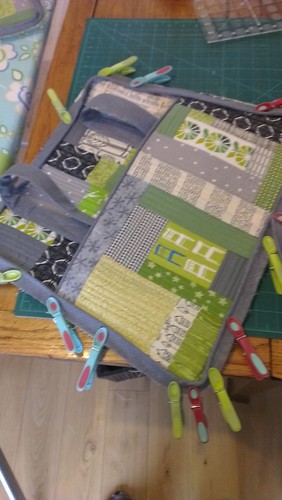
And then I sewed like a
woman possessed until it was finished. Of course this was before I discovered Clover wonderclips ...
And here are the
reflections that I wrote up immediately afterwards:
"If I did it again I
would cut the cotton duck panels a little larger than the pattern pieces,
centred over the batting then trim to size with the pattern pieces. Extra faff
but the pieces definitely shrunk a little through the QAYG process which made
my lining extra baggy.
I chose to just do my
bottom panel in one piece of plain grey fabric (same as below the pocket line
on my panels). I debated it a lot but I wanted to be able to just plonk it down
wherever without feeling precious about the pretty fabrics on the bottom, and I
had no energy to attempt to add feet to the base. So just plain QAYGd on in the
same way as the other panels.
Making the piping. I
used this tutorial to make my bias tape from a FQ of grey
quilters linen. It wasn't perfect but it went okay. It makes the bias tape a
little wider than the pattern suggests but I went with that to allow extra in
my seam allowances.
I then used this tutorial to make the piping using fusible tape. Very
easy. btw I got my cording and zips from Jaycotts online and everything else
from cotton patch.
Handles. I cut the strips
5" wide, pressed in half and folded the edges to the centre. I cut a piece
of peltex (the vilene equivalent from cotton patch) to the width of one folded
half (can't remember exactly). I also made them longer - about 56" but I
had to join 2 strips as I didn't have a long enough cut of the fabric (grey
quilters linen to match the piping). I actually added a short piece to each end
of each handle to hide the joins in the pockets. Used this tutorial. But with peltex instead of interfacing.
I actually wish I had used
interfacing and a piece of batting and quiltied the handles for strength as the
peltex gives a creased cardboard type look where it gets creased which I am not
in love with. The width and length are perfect though and they feel strong. I
added a cross between the attachment lines for strength.
The zip. I have never,
ever installed a zip ever before so I just followed the pattern. It was easy
and worked perfectly. I used a 32" separating zipper and just created a
zipper stop and trimmed as explained in the pattern.
I added a zipper pull made
from a scrap of fabric.
Step 11 is a bit of a
beast. I marked the 1/2" seam allowance but tbh it's irrelevant, you
just need to crowd close to the piping. Pinning is impossible so I tried
clothes pegs but that was a nightmare too so I basically just pinned at the
marked top and bottom points then effectively machine basted at points around
the straight edges to hold it all together. I didn't attempt the corners till
it was all secure. I went over each piece of stitching many times, to get close
enough to the piping and also for strength. Then I ran round the edges again
within the seam allowance to reinforce further.
It is really hard to get
close to the piping. I used my zipper foot, went really really slow and used a
small pair of scissors to press the fabric down ahead of the foot for each
stitch. I didn't break any needles but my thread broke - ahem - a few times.
Replacing with a new needle helped, I got through 3 jeans/ denim needles.
The lining. I added a
zipper pocket and a divided pocket to my lining, again never done before but
followed tutorials here and it was easy. I used quilting
weight fabric (rather than home dec) so used medium interfacing on all my lining
pieces (except the top panels because I forgot). Making the lining was fine. Sewing
the lining in was not fine just a total wrestle, it's a bit of a mess tbh
but I am beyond caring. I turned the bag inside out and matched the
lining in then hand basted then machine sewed the base into place along one of
the seam allowances between the main panel and base. I then stretched it up and
slip stitched it close to the zipper. Too close tbh, I think it's catching in a
couple of places so watch that. I then slip stitched round the top/ main panel
seam as far into the bag as I could reach. This is the messy bit, it
was baggy and awkward and my fingers are almost bleeding but it
fundamentally looks okay.
The false bottom covers a
multitude of lining sins and I think it will be even between when full of stuff. I
didn't buy template plastic so used 4 pieces of peltex. I machine sewed rather
than hand sewed the opening closed as I was losing the will to live.
I do have some
reservations about how it will hold up*. That is a reflection on my skills, not
the pattern!! The bag itself is sound (I hope!!!) but I am
prepared to have to restitch the lining in places. Also the zip has already
caught the fabric in a couple of places, I used a brass tooth zip and would
have preferred plastic for this reason.
I wish I had added
magnetic snaps to the main pockets. But I had none and couldn't wait, so I didn't. They would have been a fab addition as the main pockets do gape a
little.
Oh and I had extra piping
so I added it to my side pockets. Looks good and seemed a shame to waste
it.
BUT all that aside I am
actually chuffed to pieces. I keep looking at it and can't believe I made
it."
I used this as my hospital
bag when I had DD2 and it makes me very, very happy indeed. I think it is my
proudest sewing achievement to date. I hope you have enjoyed reading about
it.
And pics, of course.


* I have used this bag many time and am happy to report it hasn't fallen to pieces yet!
I made one of these last summer- did you find it hard going thwn attaching the gusset? I found all the layers (piping, 3 layers of pocket, 3 layers of body fabric, 3 layers of gusset fabric) really hard going, in fact I hand stitched the corners in the end. I use my bag a lot and one of my handles has come away at one point of the top stitching but it has had a few heavy loads in there (and has been thrown down in a temper when lost in Toronto's Chinatown trying to find our hotel last October). I used webbing for the handles and covered them with fabric but I should have top stitched as it goes all wrinkly and weird, I might still just zig zag along the bits I hold if I get round to it.
ReplyDeleteHannah, it's gorgeous, the colours are so great. You have way more patience than me to attempt this and it shows as it's beautifully made. *Sigh* maybe one day…. x
ReplyDeletegreat bag. I've made a few in my time but they've been alot easier than this one xx
ReplyDeleteI detested making mine, it is back in pieces as the dimensions are not right and it had nipples at the bottom corners!!! I will be reducing the fabric across the bottom and re-putting it back together, once I've found the enthusiasm for it. I wouldn't make it again, I think i would try either the aeroplane bag, or Heidi at Fabric Mutts latest bag, which looks loads easier!! Yours looks fab, I'm still not convinced they're worth the effort though :o)
ReplyDeleteOh, it's gorgeous Hannah! This is on my to do list - I really fancy trying the QAYG but a little nervous about fabric combinations. Love your blog name by the way.......you sound like a needle-wielding cowgirl ;) x
ReplyDeleteOh you goddess!! I still haven't plucked up the courage to start mine. I'm going to pin this and come back to it when I'm feeling a little more brave. Thank you for sharing. X
ReplyDeleteWow! what a magnificent Weekender.
ReplyDelete