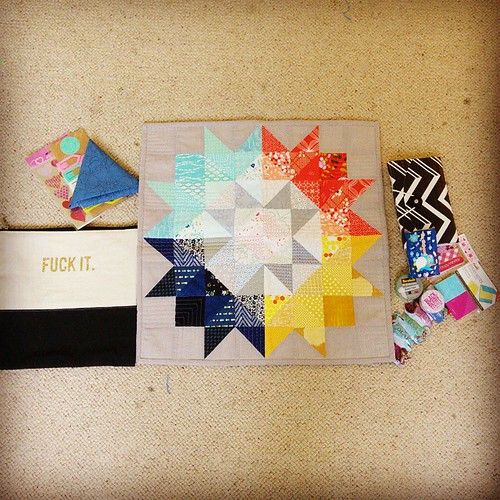
Good morning and welcome to the Oakshott blog hop! I feel very proud to be one of eight lucky quilters and bloggers chosen to show you some fun and fabulous ways to use this beautiful new Oakshott colourshott stack.

The blog hop is being hosted by Lynne over at Lily's Quilts and you can find the full schedule, and links through to the other projects, right here.
I was sent this stack of 27 10" squares of Colourshott shot cottons, along with 1.5m of the shimmery white Colourshott 57 "Camargue" as background fabric. I wanted to put together a really straightforward but good sized quilt that maximised every inch of these pretty fabrics. So here is my tutorial for a simple hourglass block lap quilt. I hope you will all have a go at making one - the same block pattern can be used for any layer cake squares, but it really is particularly effective with these multi-toned Oakshott cottons.
Hourglass quilt tutorial
Finished quilt size 51" by 68"
Fabric requirements
An Oakshott Colourshott stack* or 24 coloured fabric 10" squares
1 3/4 yards of 54" wide white background fabric (I used Colourshott 57 Camargue)
4 yards backing fabric
1/2 yard binding fabric (I used Colourshott 38 Fleur)
*You only need 24 10" coloured squares for this quilt so you can start by setting aside three of your Colourshott stack squares. I just took out the white ones - Camargue and White Marble - as they were too close to my background colour. I then made blocks with the remaining 25 squares and then selected my favourite layout. I will give instructions to do the same.
Make your blocks!
Cut your 54" wide background fabric into five 10" strips. Subcut each strip into five 10" squares for a total of 25 background 10" squares.
On the wrong side of each white background square draw a diagonal pencil line.

Pin each white square right sides together (RST) with a coloured square, being sure to keep your pins well away from the drawn line.

Sew 1/4" down each side of the drawn line. Chain piece this step!

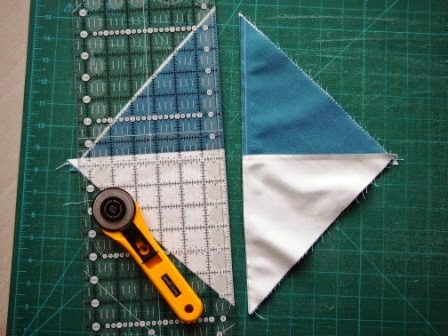
Snip all your chain piecing threads then cut each block along the drawn pencil line. This will give you two half square triangles (HSTs) in each colour. Be sure to keep them in colour pairs, don't jumble them up! Press each HST to the coloured side. Don't be tempted to press these seams open - we will be locking our seams together later to get perfect hourglass points!


Take one of your HSTs and draw a diagonal pencil line on the wrong side as show. This line will bisect your existing seam.

Once you've drawn the line, pair the HST with its colour matching partner, RST, coloured half to white half as shown. Your seams are pressed in opposite directions and will lock perfectly together, be sure to nestle them up against each other so they are locked but not overlapping. Pin, again well away from the drawn line.


Repeat this process for all pairs of HSTs so that you have a pile of hourglass blocks pinned and ready to chain piece!
Sew 1/4" down each side of the drawn line as before.
Cut along the drawn line.
Press seams to the side or open as you prefer. Open seams here reduce the bulk but I never have the patience for it!

Trim all your hourglass blocks to 9" unfinished using a large square ruler.
Make your quilt top!
Lay out 24 of your hourglass blocks in a 6 by 8 layout. Rotate alternate blocks through 90 degrees so that the coloured triangles are always next to the white triangles as shown in the photo below. I went for a fairly random layout but you can choose whatever pleases you most.

Once you have chosen your layout, label your blocks so you can keep track of them. Piece into eight rows of 6 blocks each. Press seams in alternate rows in opposite directions, ie top row to the right, next row to the left and so on. Then pin (or glue baste for perfect points) your rows together, locking seams as before. Press well and admire your finished quilt top!
Finish your quilt!
Remove the selvages from your backing fabric, cut in half and piece together down the selvage edge with a 1/2" seam. This gives you a backing sized approximately 80" by 72" which is plenty big enough.
Baste your quilt using your preferred method and quilt as desired! I used Aurifil 50wt #2021 and quilted simple straight-ish lines 1/4" to each side of each block seam line, both horizontally and vertically.


Cut your binding fabric into 2.25" strips. My binding fabric was 54" wide so I only needed 5 strips. Sew these together end to end then press the strip in half to make your binding. Bind your quilt! I prefer to attach the binding to the front by machine then hand sew it down to the back for a neat finish.


And you're all done! A super simple, great sized quilt and - best of all - minimal fabric waste.
If you make an hourglass quilt using these blocks and these very special cottons I'd love to see it. You can find and tag me on Instagram @hannlib.


Don't forget to pop back to Lily's Quilts to check out the rest of the blog hop schedule - there have been some wonderful projects already!